
OKTA + Kandji: Auto Lock that bish during deactivation

Alright, I’m just gonna jump into this one because let’s be honest—no one reads a long intro on a blog post when your goal is to lock a rogue MacBook the second someone gets deactivated in Okta. This tutorial will walk you through how to set up an Okta Workflow* that instantly locks Kandji-managed devices when an employee is deactivated. It's basically the digital equivalent of your laptop saying, “You don’t go here.”
This is part of embracing the cattle philosophy—not because we love offboardings (we don’t), but because your offboarding game should be strong, fast, and automatic.
Let’s get into it.
*this blog post assumes that you already have given API access to both the Okta workflows connector, Kandji connector, and Slack connector in the workflows connections panel
🔒 Step 1: Use the Okta Deactivation Trigger
This is where it all starts. The user gets deactivated in Okta. Maybe they quit, maybe they were let go, or maybe they just rage-quit during a 1:1. Either way, we want their Mac locked immediately.
Set up a workflow using the “User Deactivated” trigger as your starting point from Okta Workflows console.
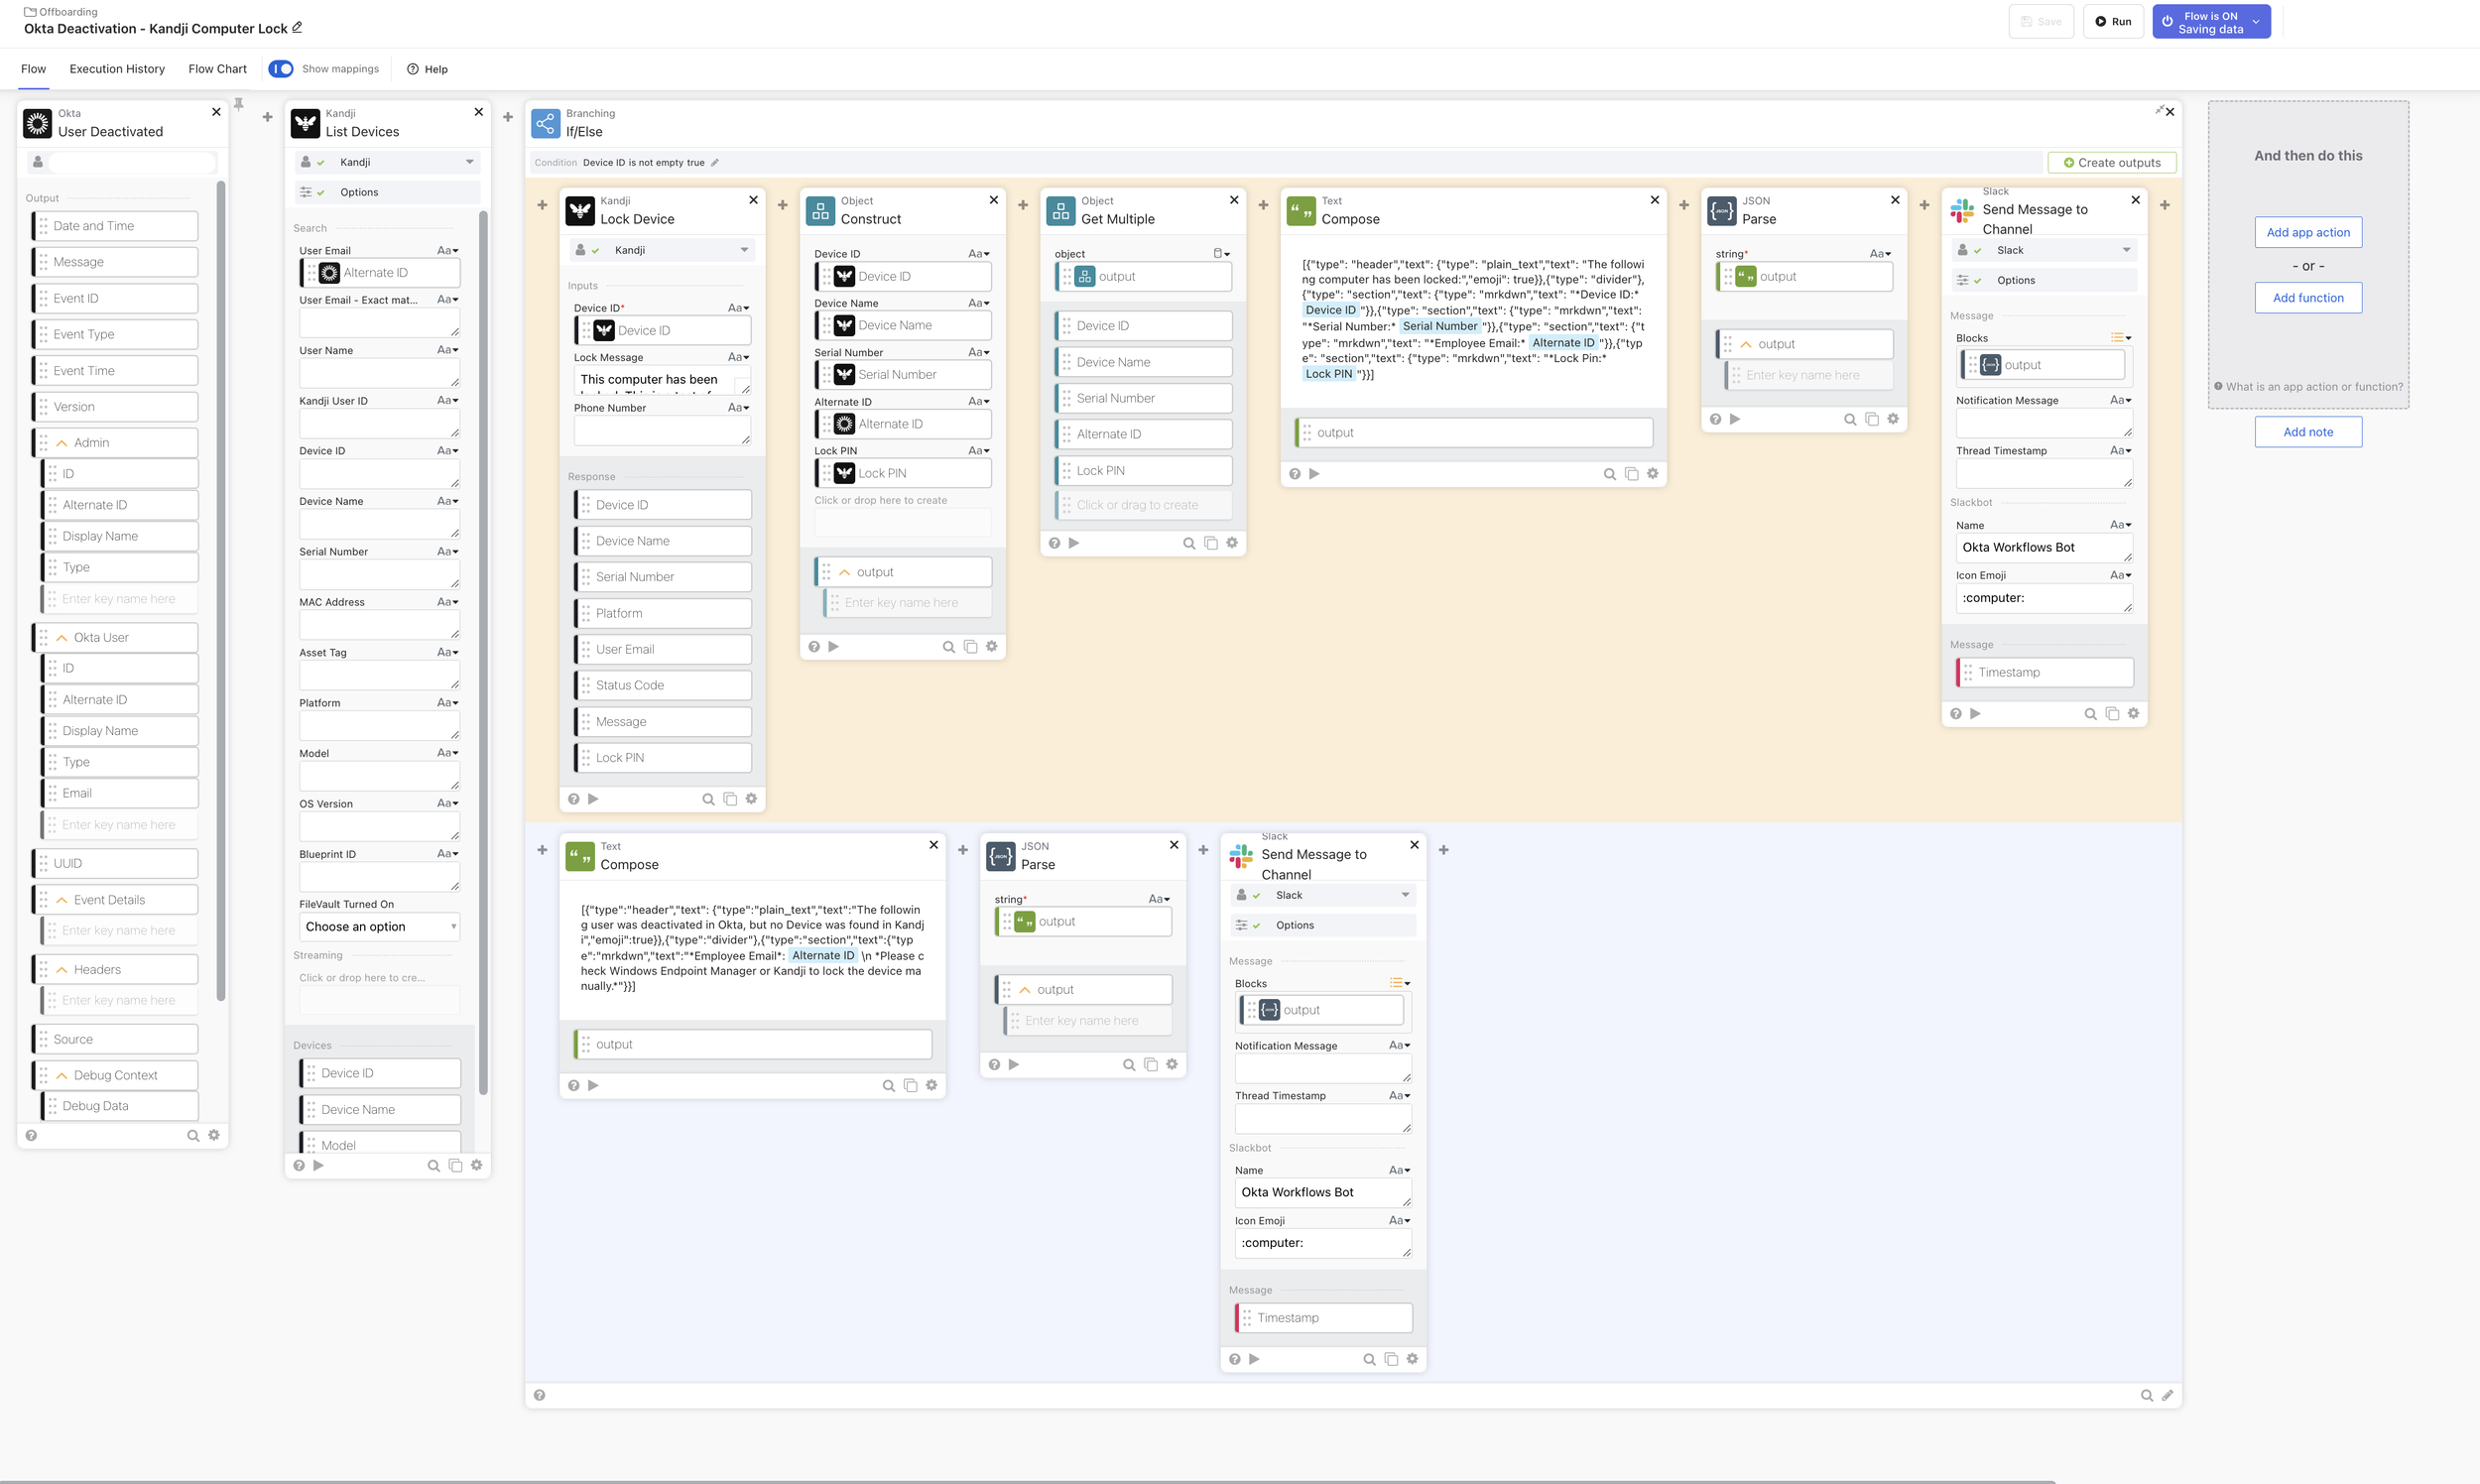
Workflow Overview: An example of the full workflow overview in the Okta Workflows UI.
👀 Step 2: Use the Kandji List Devices Action
Next, we use the “Kandji: List Devices” action to see if this user has any Kandji-registered devices associated with them. This step is essential because we don’t want to try and lock a ghost. Plug in the Okta user Alternate ID into the Kandji user email field for your search. (The Alternate ID in Okta workflows refers to their username/login, whereas the ID refers to their Okta unique identification number. Note that we will also use that alternate ID in the following step later on)
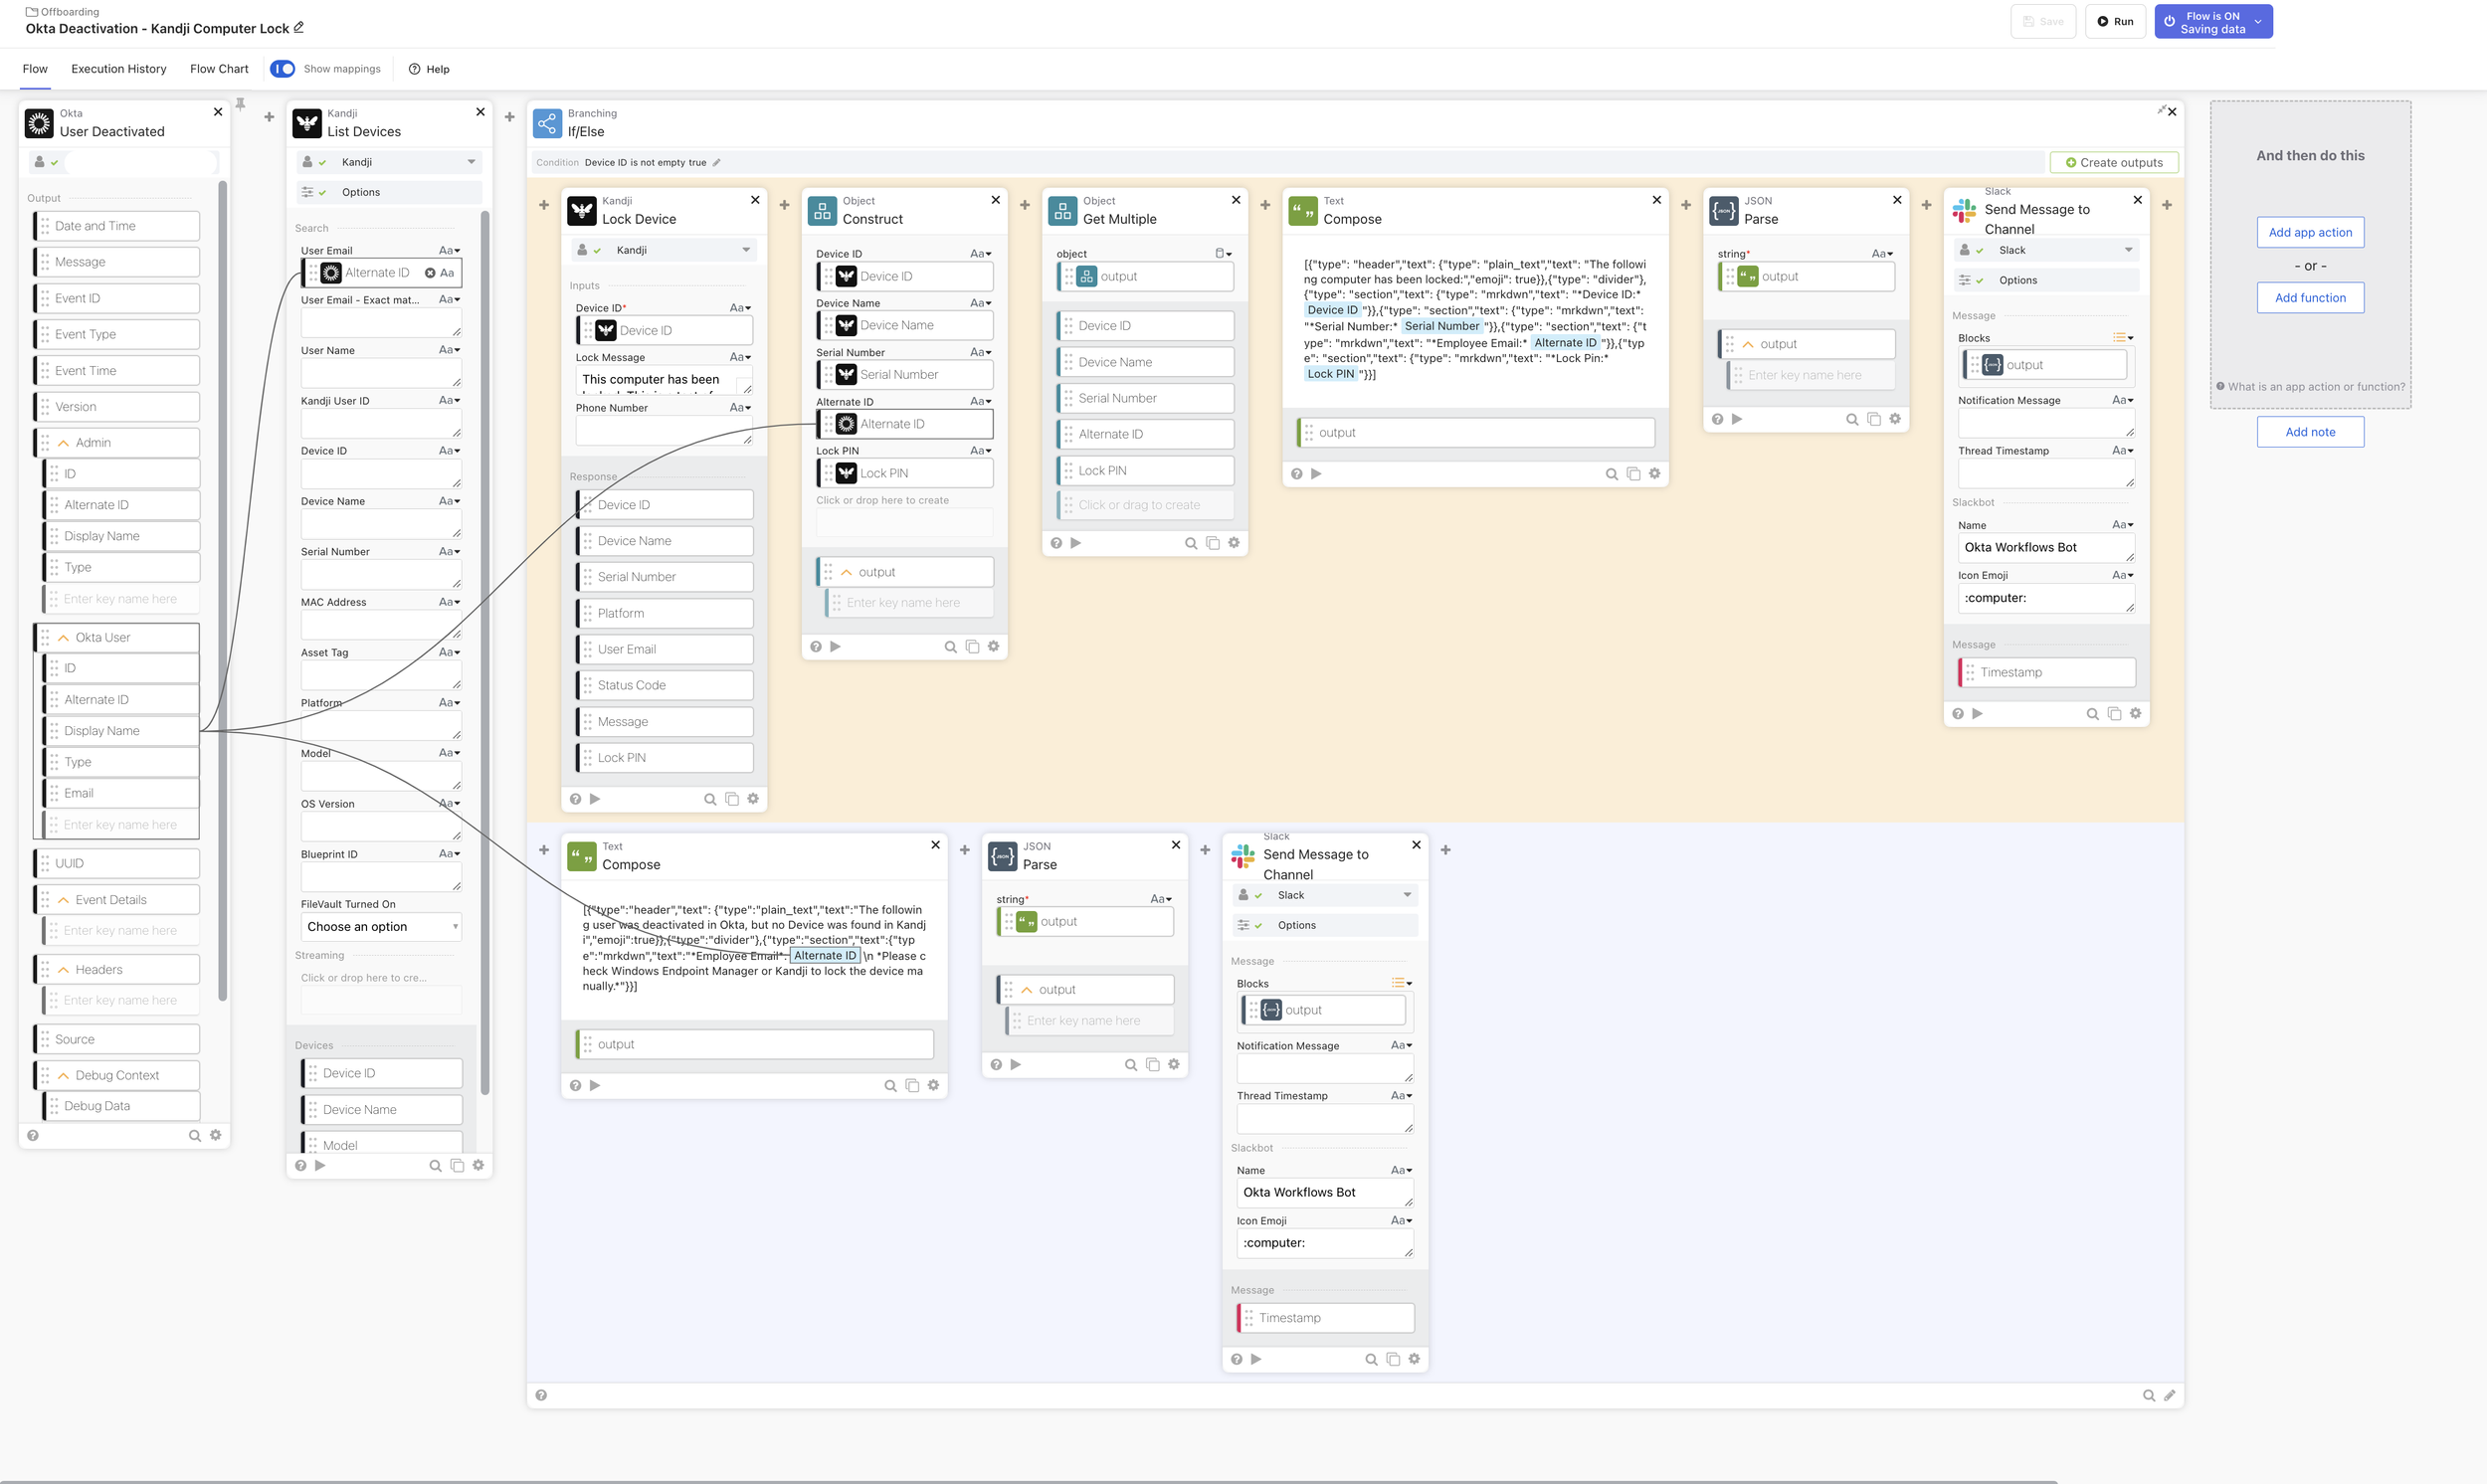
Use the Kandji List Devices action to pull data related to the user’s computer.
🧠 Step 3: If/Else — Is a Device Even There?
Time for a little logic: we will use a branching If / Else block to determine if the user has any active device record returned from Kandji. This If / Else block will Lock the device, grab data and send an alert in the if section, and simply send a notification in the else section. Either way we want a notification either to say that we successfully locked the device or nothing was found and we need to do some manual checks.
Basically: “Do they have gear? Yes? Cool, lock it. No? Skip the lock, but still send a notification for manual checks.”
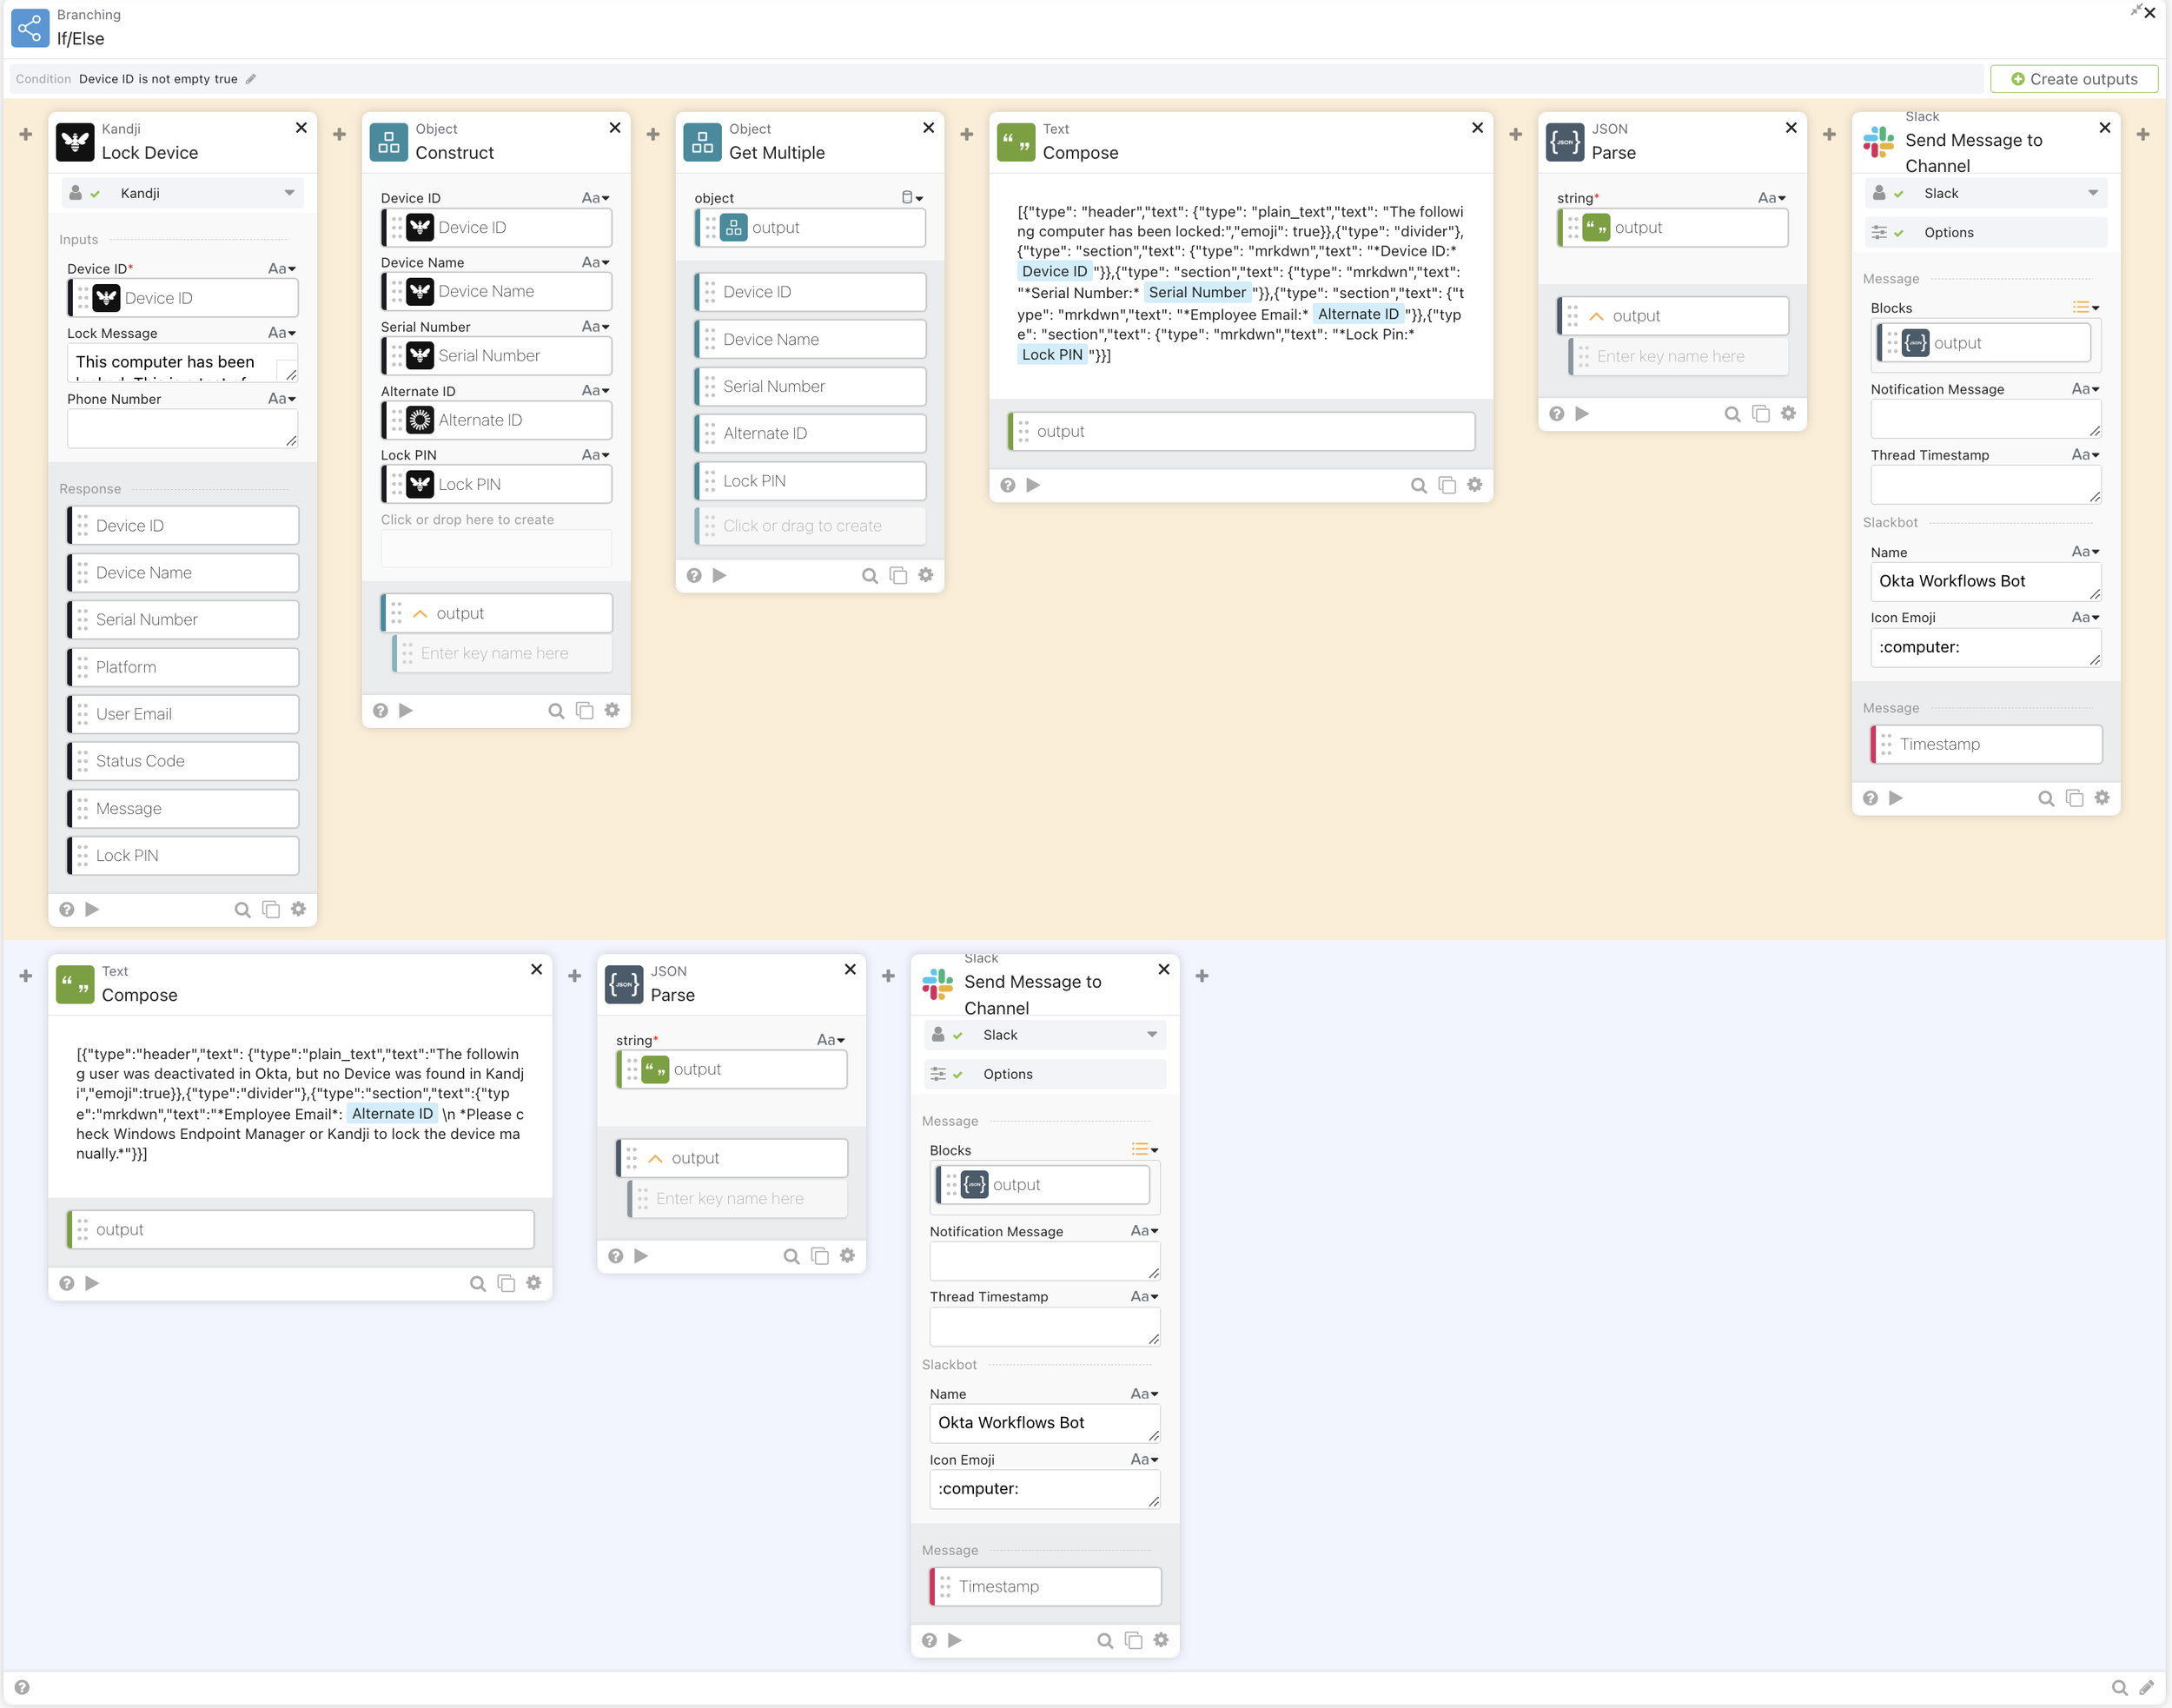
If, device is present, lock it / else, send a notification
🔐 Step 4: Lock the Device (With Style)
If the condition passes, the workflow then runs the “Kandji: Lock Device” action. This is where the magic happens. You can also include a custom lock message like:
"This device has been locked by IT. Please contact support if this is unexpected."
Boom. Locked.
For our Audit log and Notification messaging we’ll also use some of the data that is returned from the Kandji API in the output section of the Lock Device step.
🧱 Step 5: Use the Object Construct (JSON Party Time)
Once the lock action runs, you’ll get a payload back from Kandji in the output/response of the Kandji: Lock Device workflow card. We’ll use “Object: Construct” to create a nice JSON object from the data returned in the lock step. Extract what you need: device name, serial number, assigned user, status—whatever makes your Slack post look impressive. Some of the data even can you even come from the initial steps of user deactivation.
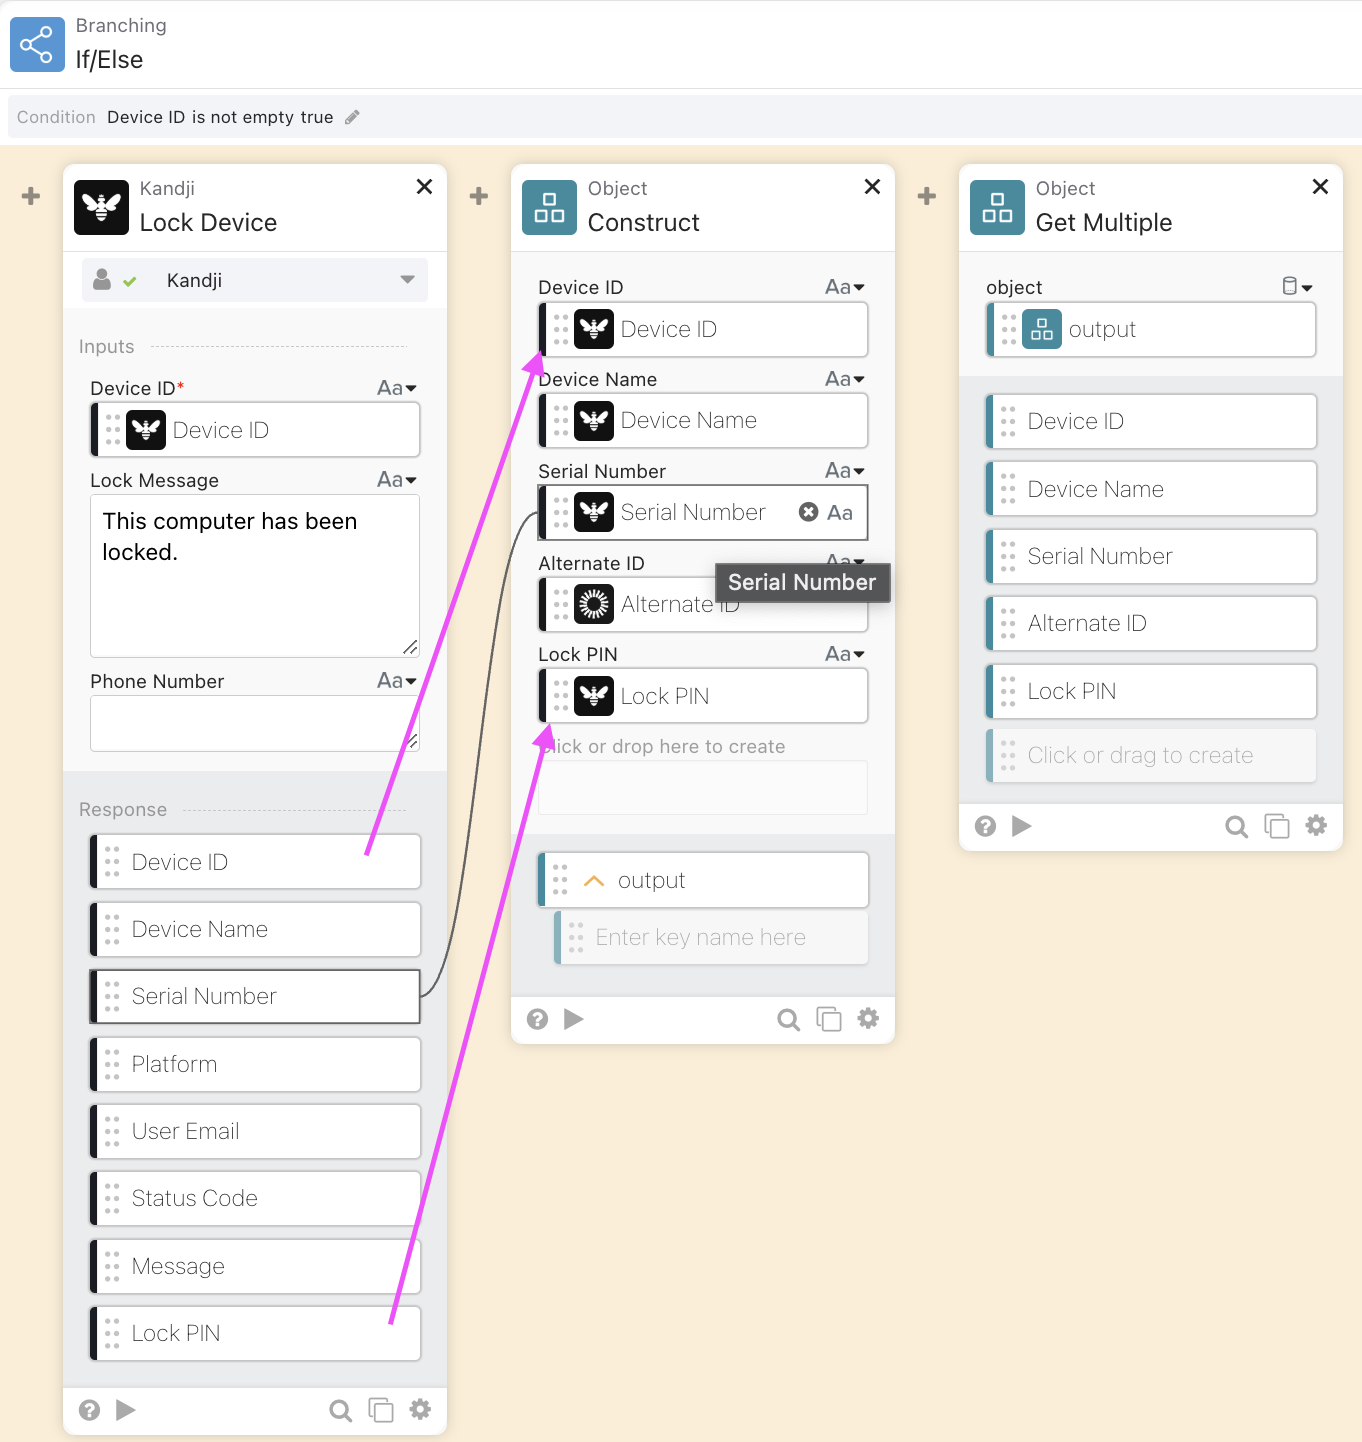
Construct the JSON Object
🛠 Step 6: Object Get Multiple — Strip the JSON
Now take that JSON object output from step 5 and use the “Object: Get Multiple” action to unpack it into individual variables. This step lets us insert real device data into our Slack post (because vague alerts are a crime). Although this seems redundant to step 5, it’s required to isolate the JSON value from the key/value pair prior to handing it off to the text compose step. Otherwise you're gonna have a bunch of brackets and spaces you’ll have to deal with.
🧾 Step 7: Compose a Slack Block Kit Message
Here will use the individual outputs from the previous step and feed them into the Text: Compose function and build your Slack message using Block Kit formatting. Here’s a simple example that I use:
This is the IT version of “The Eagle has landed.”
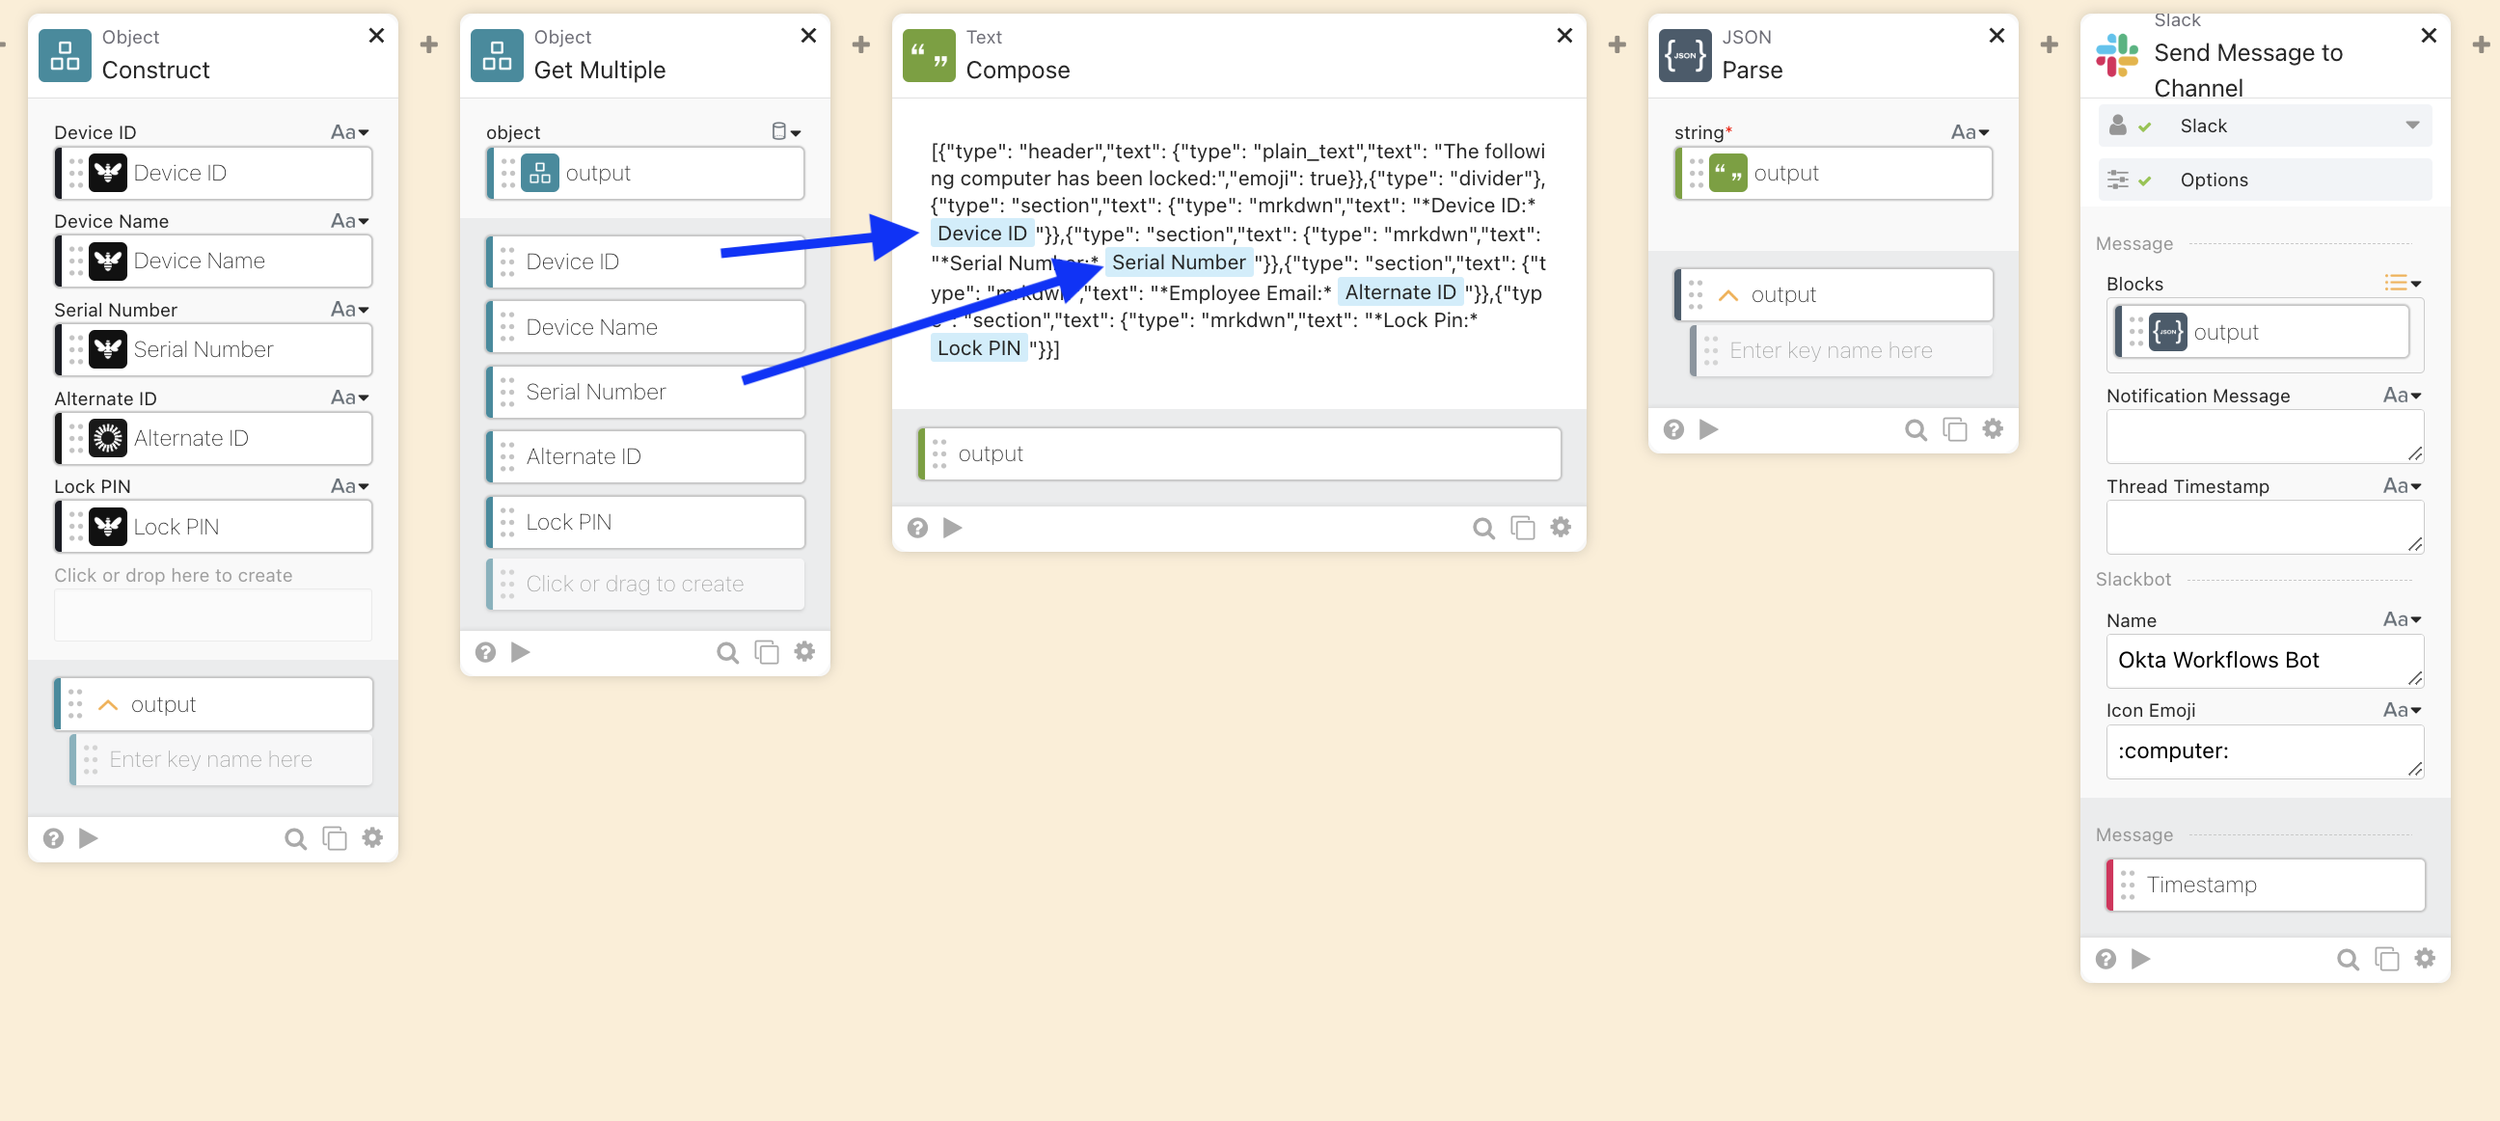
Add the outputs to your text compose JSON block
💬 Step 8: Send it to Slack (Private Channel Only)
We’ll do one final JSON parse, as you can see the above screenshot, that converts the text compose back into a JSON structure that the Slack Connector will understand. Send the output of the JSON: Parse connector to the Slack: Send Message to Channel. Make sure the message output is using blocks, give your slack by a name and an emoji icon if you wish and put in the specific private channel ID where your IT/Security altering lives. You can find a private channel ID in Slack by checking the channel settings.
This is your audit trail, your alert, and your moment of glory.

Successful Slack notification
Wrapping It Up
Now that you've followed this blog, the workflow should only take about an hour to build and test. Then it’s set it and forget it. It’s a great example of:
Treating devices like cattle, not pets 🐄
Building scalable offboarding automations 🧠
Showing your execs that your IT team is not to be trifled with 💪
If you’re still manually logging into Kandji to lock devices, I’m begging you—please stop. Let automation do the boring stuff so you can get back to actual strategy work (or... let’s be honest... fixing someone's AirPlay).
✌️ Until next time—automate everything, question everything, and treat your workflows like your coffee: strong and reliable.